Second floor flooring – Part I
Here I come back to talk about the biggest project we’ve ventured so far – the second floor flooring!!
Just to remind you, our house is 16 years old. A lot of things haven’t been changed since then, one of them the carpet on the second floor (which was in good condition, but it was green/blue and sort of dirty).
In my routine at work, I see that some clients like carpets in bedroom areas and I do find a bit more comfortable, specially in cold months, but I just can go past the potential bacteria growth and cleaning that comes along with it. I find that kids/dogs and carpets are not the best combination. There’s also the allergies. Diego was not having a good time and seems that the carpet was not helping.
Once we finally decided to get things moving, was already end of June. I did some research online and visited a few local flooring stores for flooring samples, colours and prices. Originally, we were considering paying for installation as part as the whole project, but estimates were hard to swallow. We would pay more than 2x the price to get everything done, which was kind a way bigger investment than we anticipated. Of course, we spent more than a month on this project (only 1 hour each day during week days) and it was a lot of work.
After looking at a few options on materials, we decided to go with laminate flooring, also known as floating floors. Solid hardwood was the primary option, but went way over budget and it had to be nailed, which I was not entirely confident on doing.
We ended up picking a good quality laminate flooring (AC-4 – rating that attests durability on a floating floors – goes from 1 to 5), that should resist to kids, dogs and furniture pretty well. I placed the order in store and had a truck rented to pick up in the next day (50 boxes of flooring – 9 rolls of underlayment – accessories). Diego had to load and unload the truck all by himself and it was not that fun… 🙂
We started the carpet removal on that very same day. It was not as hard as we thought for the carpet removal, but the nails that were holding the underlayment on the subfloor were a pain. Honourable mention to Diego, again, who took care of all the carpet removal, leaving it clean and ready for the installation.
 |
| This is the one!! |
 |
| Unloading the rental truck – from the store |
 |
| A lot of boxes… 50! |
 |
| That’s the before – please forgive the flooring boxes already on the floor (I forgot to get a photo before that…) :0 |
 |
| The carpet! |
 |
| Carpet removal starts! |
 |
| Carpet was gone on the hallway – our starting point. |
 |
| Stairs area |
After leaving some of the boxes rest in the room for 48 hours (when the flooring acclimatizes with the room temperature and humidity), we could start the install. We chose to start in the center of the second floor, which meant that the hallway would be the first room, as we were planning to have a continuous look and no transitions between all the rooms (excluding the bathrooms).
The biggest challenge in the very beginning is to set the rolls as straight as possible, as it’s going to dictate the whole flooring install from here.
As we knew it would take us a lot of time to complete the job, we took the carpet out in stages/rooms and learned as we went.
The installation is, theoretically, easy. Once the subfloor is clean, unroll the underlayment and start laying the planks along the longest wall in the room. The boards/planks come with click system, so there’s no glue or nailing required. Some tools are required for this stage, such as a pencil, tape measure, a pull bar, rubber mallet, tapping block and spacers (you should leave a gap between the wall the rows for flooring expansions with temperature and humidity changes), mitre saw and table saw.
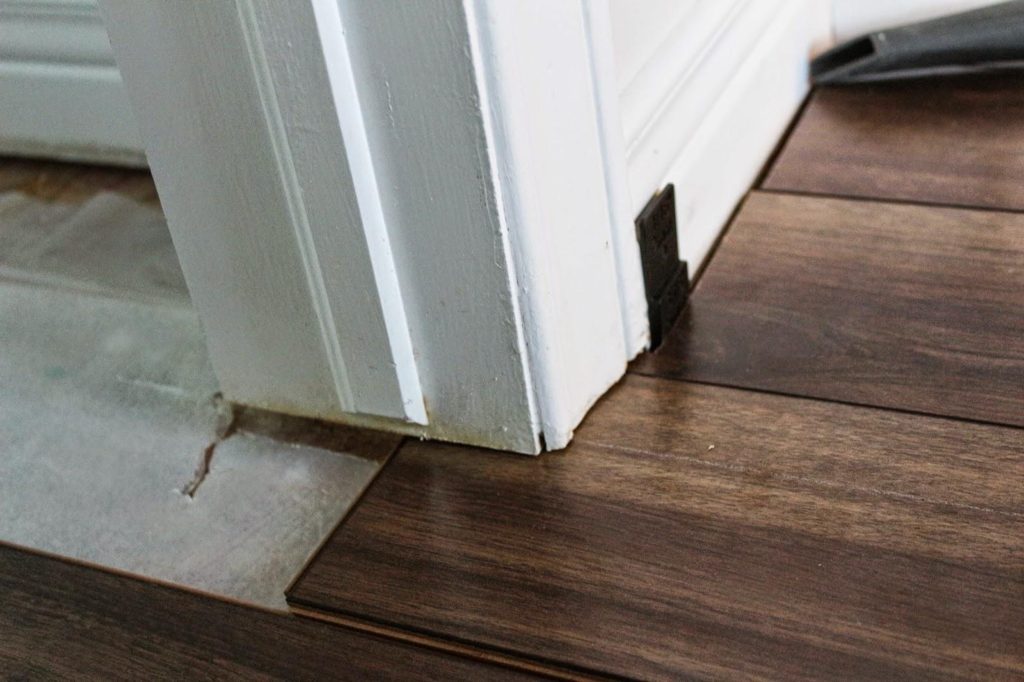
We took the time to trim the bottom of each door, including closets, to obtain a nicer look at those junctions. It was not easy, since all the little cuts had to fit under the door jambs and still follow the flooring lines (highly recommended to get one of those multi-tools for these cut – with the hand saw, we would’ve given up in the first room…rsrsrs).
 |
| The beginning – first few rows |
 |
| Cuts under door jambs to accommodate the flooring – cleaner look This multi-tool was a must! |
 |
| First room taking shape… |
 |
| Another detail at the doors |
 |
| Bye carpet! |
 |
| Last row in this room! |
 |
| Installing the flooring and keeping the furniture in the room – requires some logistics and rearranging. |
Next post on the series, some more details on the installation process and how it looks currently.
Happy renovations!


2 Comments
Amanda
Otima escolha de piso, eu uso muito laminado e vinilico com os meus clientes aqui no Brasil! Mas será que vou dar conta de instalar meu próprio?????
Ps: tenho pavor de carpete 🙁
Hilteman Lorri
This post is one of the most for me,its very informative and thanks for telling all information,nice use of images and i would like to installed wood floor.
flooring greenville nc